Deep Cleaning Your Car’s Interior: A Complete Guide
Deep cleaning a car’s interior involves a systematic approach that addresses various surfaces and materials, each requiring specific methods and products. This guide outlines processes for shampooing carpets, treating leather seats, and sanitizing vents, with the goal of achieving a showroom-fresh cabin. The focus is on methodologies that can be applied by professionals or enthusiasts, emphasizing transparency in steps and the conditional nature of results.
The interior of a vehicle accumulates dust, dirt, and allergens over time, making periodic deep cleaning beneficial for maintaining a pleasant environment. Different materials such as fabric, leather, and plastic require tailored cleaning agents to avoid damage. Understanding these differences is crucial for effective cleaning without adverse effects.
In this article, we explore a range of techniques from pre-treatment to final touches, providing a comprehensive overview. While the aim is a revitalized interior, outcomes depend on factors like the condition of surfaces, the products used, and the thoroughness of the process. Always test cleaning solutions on a small, inconspicuous area first.
Preparing the Interior for Deep Cleaning
Before any cleaning begins, it is essential to remove all personal items, floor mats, and trash from the vehicle. This step allows access to all areas and prevents interference during the cleaning process. A thorough vacuuming with a crevice tool and brush attachment removes loose dirt and debris from carpets, seats, and vents. This initial vacuuming is critical as it reduces the amount of particulate matter that could become mud when liquids are applied.
Gather necessary supplies such as a carpet shampooer, leather cleaner, soft brushes, microfiber towels, and a vent cleaning tool. Ensure proper ventilation by opening windows or doors, and consider wearing gloves and a mask if using strong chemicals. Work in a shaded area to prevent cleaning solutions from drying too quickly, which can leave residues. It is also advisable to check the manufacturer’s recommendations for your vehicle’s interior materials to avoid incompatible products.
Shampooing Carpets and Upholstery
Shampooing carpets and fabric upholstery involves a multi-step process to lift embedded dirt and stains. Start by pre-treating heavily soiled areas with a dedicated carpet cleaner or a diluted mixture of mild detergent and water. Agitate the solution into the fibers using a soft-bristled brush, working in small sections. Allow the pre-treatment to dwell for a few minutes, but do not let it dry completely.
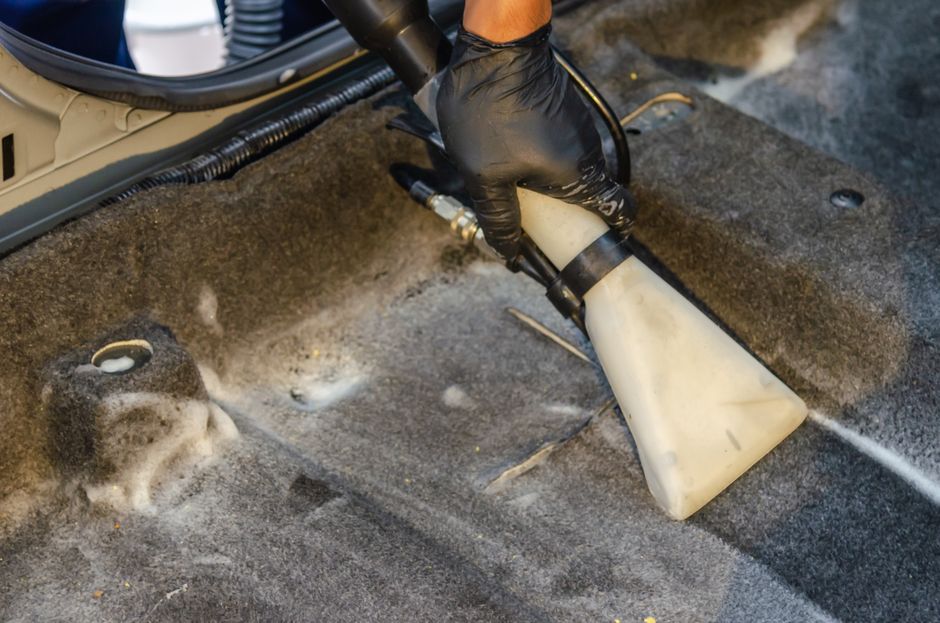
Next, use a carpet extraction machine or a shop vacuum designed for wet pickup to rinse and remove the cleaning solution along with loosened dirt. Fill the machine with clean water and a small amount of carpet shampoo if recommended, following the manufacturer’s instructions. Move the extraction wand slowly over the carpet, overlapping passes to ensure thorough removal. Repeat the process with clean water only to rinse any residual soap, as leftover shampoo can attract new dirt.
For upholstery, use a similar approach but with a gentler touch to avoid saturating the fabric. A foam cleaner can be applied with a soft brush, then wiped away with a damp microfiber towel. Always test any product on a hidden area first to check for colorfastness. After cleaning, allow the carpets and seats to dry completely, using fans or leaving windows open to speed evaporation. Avoid using the vehicle until surfaces are dry to prevent mildew.
- Pre-treat stains and high-traffic areas.
- Agitate with a soft brush to lift dirt.
- Extract with clean water to rinse.
- Allow adequate drying time.
Treating Leather Seats and Surfaces
Leather requires gentle cleaning to maintain its suppleness and prevent cracking. Begin by vacuuming the seats with a brush attachment to remove loose debris from seams and crevices. Then, apply a pH-balanced leather cleaner to a soft microfiber applicator pad, working it into the leather in a circular motion. Avoid using excessive water, as leather can absorb moisture and degrade over time. For stubborn stains, use a dedicated leather stain remover, but test it first on an inconspicuous area.
After cleaning, wipe away any residue with a clean, damp microfiber towel. It is important to remove all cleaner to prevent buildup that can attract dirt. Once the leather is dry, apply a leather conditioner to nourish and protect the material. Use a conditioner that is appropriate for the type of leather in your vehicle, and follow the product instructions for best results. Conditioning helps maintain flexibility and can provide a barrier against UV rays and spills.
Leather care should be performed regularly, but deep cleaning can be done every few months depending on usage and environmental exposure.
For perforated leather, take extra care to prevent liquid from entering the holes. Use a slightly damp applicator rather than a soaking wet one, and avoid spraying cleaner directly onto the surface. If the leather is severely worn or damaged, consider consulting a professional upholstery specialist. Prime Detail can offer guidance on appropriate products and techniques for specific leather types.
Sanitizing Vents and Hard-to-Reach Areas
Vents accumulate dust, pollen, and mold, which can affect air quality and produce odors. To clean them, start by removing the vent covers if possible, and vacuum the visible debris with a brush attachment. Then, use a vent cleaning tool—a flexible rod with a brush—to dislodge dirt from deep within the ducts. Alternatively, a can of compressed air can blow out loose particles, but be careful not to spread dust around the cabin.
For sanitizing, apply a dedicated vent cleaner or a diluted disinfectant to a microfiber cloth and wipe the vent surfaces. Avoid spraying liquids directly into the vents, as this can damage electronic components. If using a fogger or aerosol sanitizer, follow the product instructions carefully and ensure proper ventilation. Some products are designed to be sprayed into the air intake while the air conditioning is running, but this method should be used with caution and according to manufacturer guidelines.
- Remove vent covers and vacuum loose debris.
- Use a vent brush or compressed air to clean ducts.
- Apply cleaner to a cloth and wipe surfaces.
- Consider professional fogging for comprehensive sanitization.
Hard-to-reach areas such as between seats, under the dashboard, and in the trunk also require attention. Use a detailing brush and a vacuum with a crevice tool to remove dirt from these spaces. A mild all-purpose cleaner can be applied to a microfiber towel to wipe down plastic and vinyl surfaces, but avoid harsh chemicals that can cause fading or cracking. For electronic screens, use a screen-specific cleaner and a soft cloth.
Final Steps and Maintenance Tips
After cleaning, inspect the interior for any missed spots or residue. Wipe down all surfaces with a clean, dry microfiber towel to remove streaks. If desired, apply a UV protectant to plastic and vinyl to help prevent fading and cracking from sun exposure. For a finishing touch, place a fresh air freshener or use an odor neutralizer, but avoid overwhelming fragrances that can mask underlying issues.
To maintain a clean interior, establish a routine that includes regular vacuuming, immediate stain cleanup, and periodic conditioning of leather. Keep a small detail kit in the car for quick touch-ups. Parking in a garage or using a sunshade can reduce UV damage and keep interiors cooler. Over time, consistent care can extend the life of interior materials and preserve a pleasant cabin environment.
While the methods described aim for a showroom-fresh result, the actual outcome depends on the starting condition, the quality of products used, and the diligence applied. For severe cases, professional detailing services like Prime Detail may offer advanced equipment and expertise. Always follow product instructions and consider consulting a professional for delicate or valuable interiors.